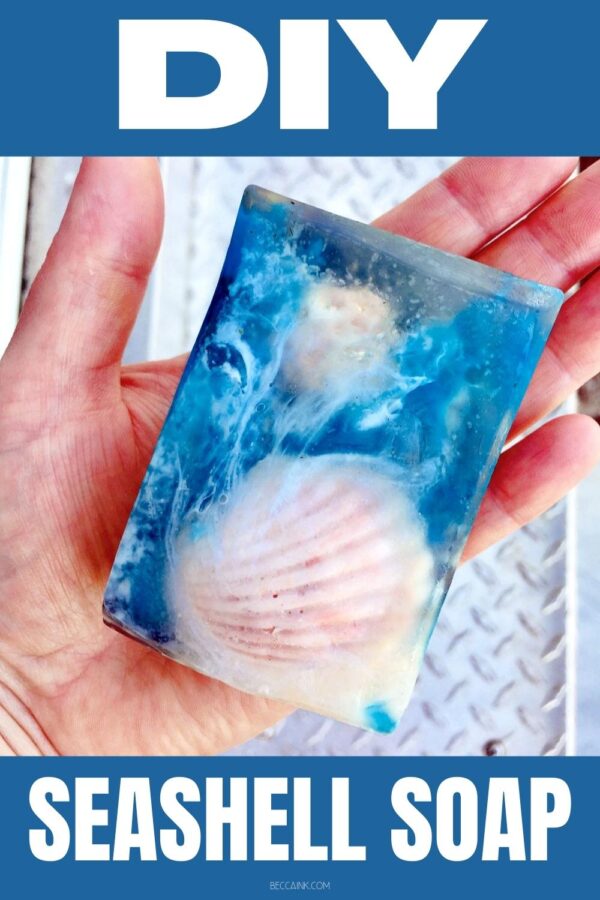
Learn how to make a DIY seashell soap using seashell soap embeds. This fun and easy melt and pour soap recipe is easy enough for beginners to craft at home this summer.

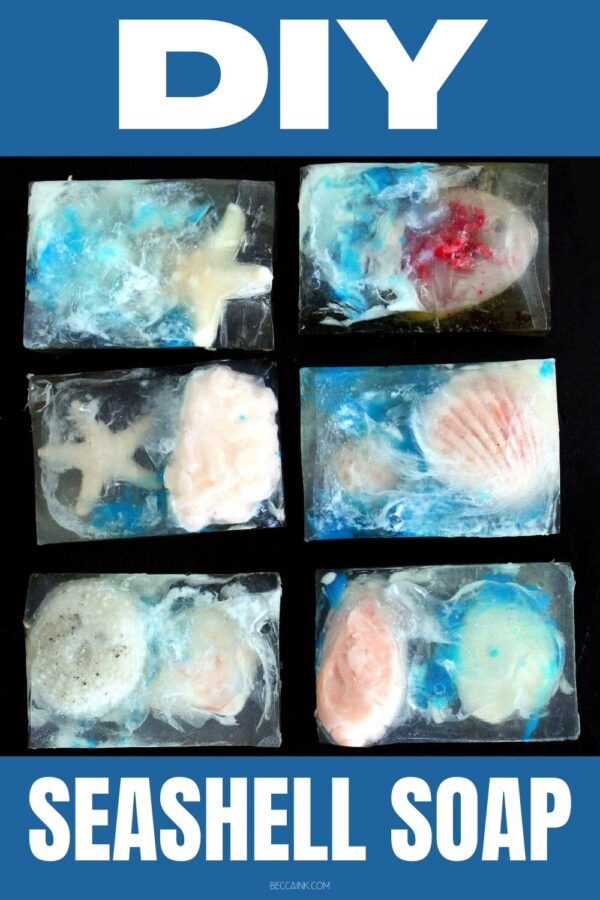
Summer means more time outdoors, vacations and fun! So to celebrate the excitement and opportunities of summer, I wanted to share a fun and easy way to make DIY seashell soap. Don’t worry. You don’t need to make a trip to the beach for this project. This super easy melt and pour soap recipe uses pre-made soap embeds for the shells. So you don’t have to worry about making your own. However, if you’re a more advanced soapmaker, you can always buy seashell silicone molds to create custom seashells.
I grew up on trips to Myrtle beach every summer until I was sixteen. Most of those years, we saved money by camping out in a campground. Not only did it give me a greater appreciation for the outdoors, I also learned that you should ALWAYS wear flip flops when using a campground shower. (Thanks, Mom!)
One of my favorite things about staying on a beach campground was the lack of hotels. Sure, there were lots of people, but there were no hotels to mar the skyline. Just beach and plants and trees. It was easy to make daily discoveries of beautiful shells, sand dollars, tiny crabs and clams in the sand.
Much like my early adventures in a hometown creek that fed into our river, I always tried to take at least one of my live discoveries home with me. While at home, I tried to create a habitat for crawdads I caught. At the beach, I took baby clams and other small (yet to be identified) creatures home in a bucket of sand and water.
Being that Myrtle Beach is a good 8-9 hour drive from my home in Virginia, these tiny sea creatures never managed to survive the trip. However that didn’t stop me from trying. Being the stubborn girl that I was (and still am apparently) I tried again year after year, until the camping trips ended. My parents, probably in their wisdom to never argue with a strong willed little girl over something so simple, never protested. Although I’m not sure how they DIDN’T looking back. An eight hour drive in an old school Dodge van with zero air conditioning and sea water left quite the lingering aroma.

How to Make DIY Seashell Soaps
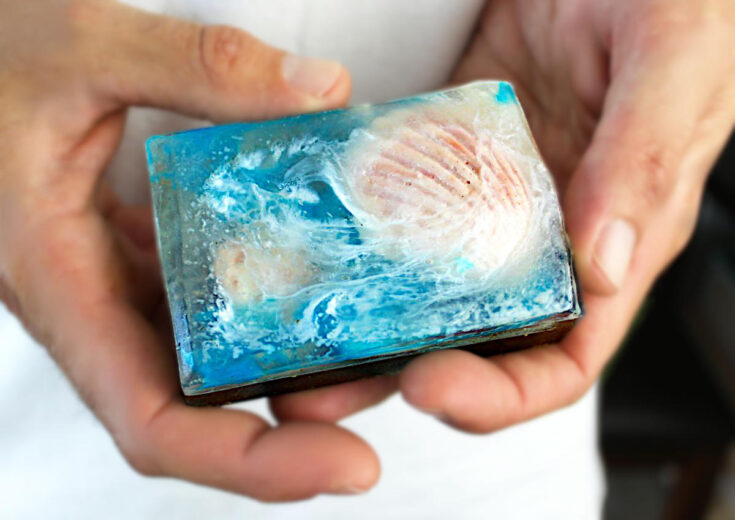
My DIY seashell soaps are a nod to those carefree summer beach trips of days past. They are reminiscent of time spent outdoors in the sun and sand. Long days hunting for seashells and mysterious creatures hidden just under the sand as the waves roll in and onto the beach.
What makes this seashell melt and pour soap recipe so easy?
Made using a melt and pour soap base, this soap making tutorial incorporates pre-made soap embeds into the recipe. This eliminates some of the challenges that come with working with embeds as a beginning soapmaker. It also saves you money, as you’ll only need one soap making mold for this soap tutorial. This helps reduce the otherwise more expensive costs of investing in multiple soap making molds. There’s also no need to work with lye. So if you’re still not ready to make cold process soap, then this soap making project is perfect for you!
Save on materials & time by purchasing pre-made elements.
While you can make your own melt and pour soap embeds for my beach soaps, this can be challenging and time consuming. Therefore I chose to use pre-made seashell soap embeds that I purchased from a fellow soapmaker. I used seashell soap embeds that I purchased from Spruce Mountain Soap to make this soap making project both simpler and faster.
My seashell soap is the perfect summer beauty recipe for cleansing your skin on hot summer days. Made with a blend of fresh litsea cubeba and peppermint essentials oils, these fun beach inspired soaps help to brighten and energize dull skin. Discover my summer soap making tutorial and recipe below. And don’t forget to check out the other summer beauty recipes for everything from an aloe vera face mask to mermaid fizzing bath salts after the recipe!

Seashell Soap Recipe
Seashell Soap Ingredients:
21 oz. clear melt and pour soap base
3 mL litsea cubeba essential oil
1 mL peppermint essential oil
12 drops amyris essential oil
1-2 oz. white melt and pour soap base
skin safe blue mica powder, of choice
Seashell Soap Exfoliating Ingredients:
1 teaspoon calendula flower powder
1/2 teaspoon poppy seeds
1/2 teaspoon cornsilk powder
Materials & Supplies:
seashell, beach rocks or sea glass soap embeds
rectangle silicone soap mold
digital scale
graduated transfer pipettes
glass measuring cups or bowls
spray bottle with 99% isopropyl (rubbing) alcohol
utensils (for mixing) and a large Chef’s knife
cutting board
measuring spoons
microwave
your imagination
Instructions:
Being by weighing out the clear melt and pour soap base. Cut the base into chunks and combine in a large Pyrex glass measuring cup. Heat the cubed soap the microwave in 30-second increments until melted.
Once melted, use the graduated transfer pipettes to measure out and add the litsea cubeba and peppermint essential oils to soap. Follow with the amyris essential oil. Then stir the soap to mix in the fragrance.
Now pour a few ounces of the clear melted soap base into a separate measuring cup. Stir in a pinch of the blue mica and set aside.
Position your soap mold at an angle on a stable surface on a cutting board. (I used a cardboard box I cut at an angle for this step. I place the cutting board on the box, then put the mold on top of the cutting board for easy transport.)

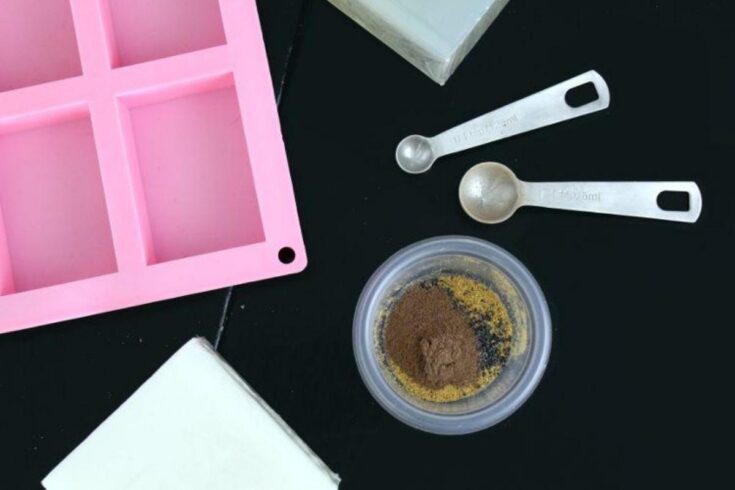
Next, measure out the exfoliants into a small bowl. (You can make substitutions as desired for this step. The purpose of the exfoliants is to mimic the look of beach sand.) Mix to combine.

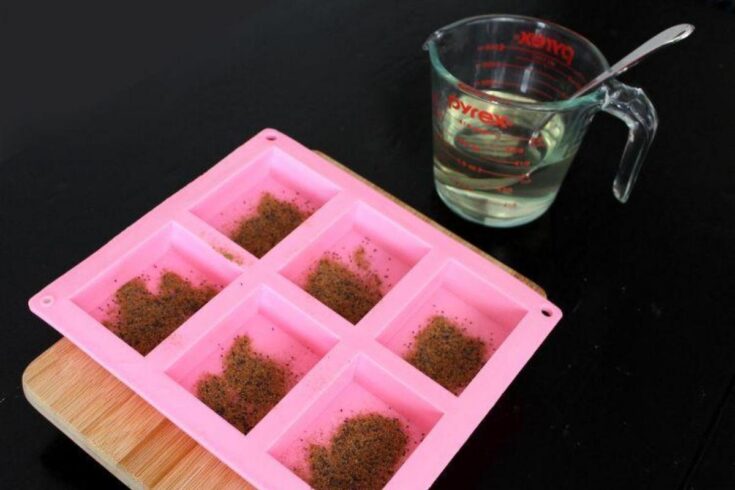
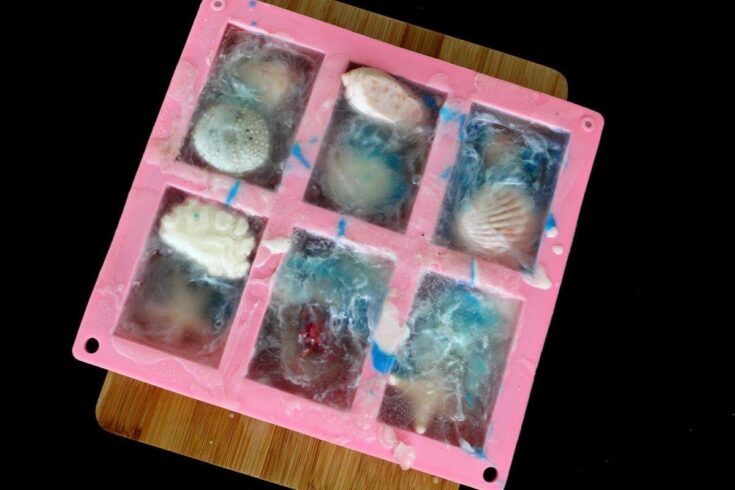
Then add a small amount of the mixture to each of the cavities of your soap mold.

Now slowly pour the clear melt and pour soap base onto the exfoliants and into the soap mold. Be sure to leave room for the seashell embeds by only filling each cavity about 1/3 of the way.
Use a utensil to reposition the exfoliants along the bottom of the mold as desired. Then spritz the top of they poured soap with alcohol to remove any air bubbles. Allow the soap to cool and harden before proceeding to the next step.
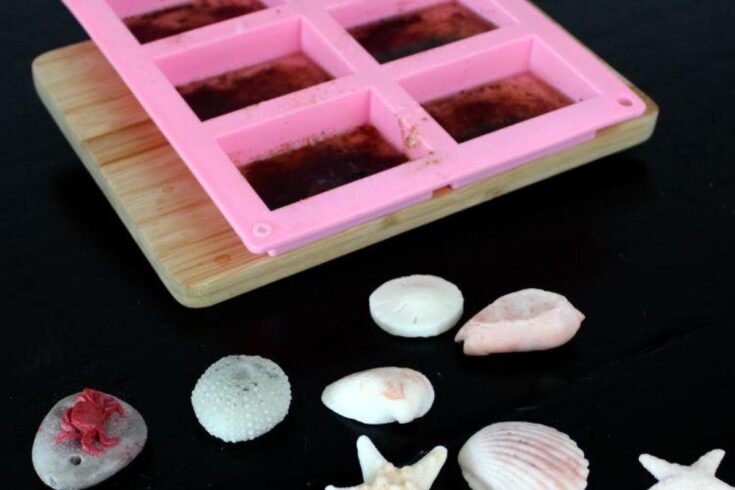
Once the first layer of soap has hardened, place the mold flat onto your work surface.
Now weigh out the white melt and pour soap base. Cut into chunks then heat in a microwave safe container in 20-30 second increments until melted. Set aside.

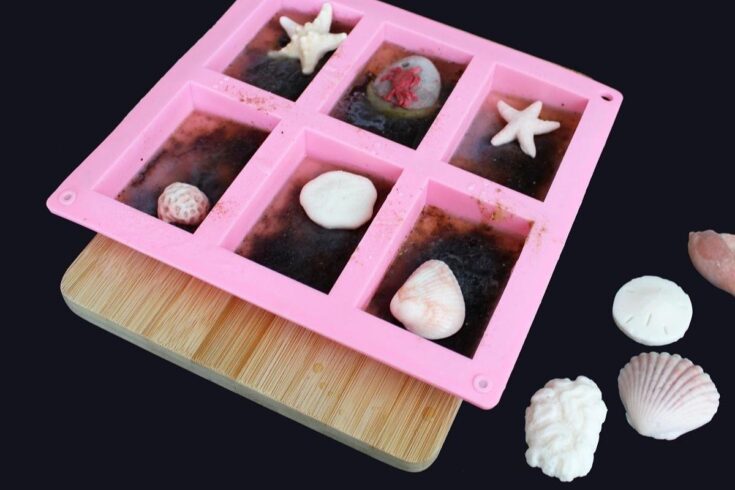
Spritz the tops of the soap in the mold with rubbing alcohol. Then place your seashell soap embeds onto the hardened soap, arranging as desired.
If necessary, gently reheat the remaining clear melt and pour soap base as well as the blue soap base. Then pour the clear soap base into each of the mold cavities leaving a small amount of space at the top.

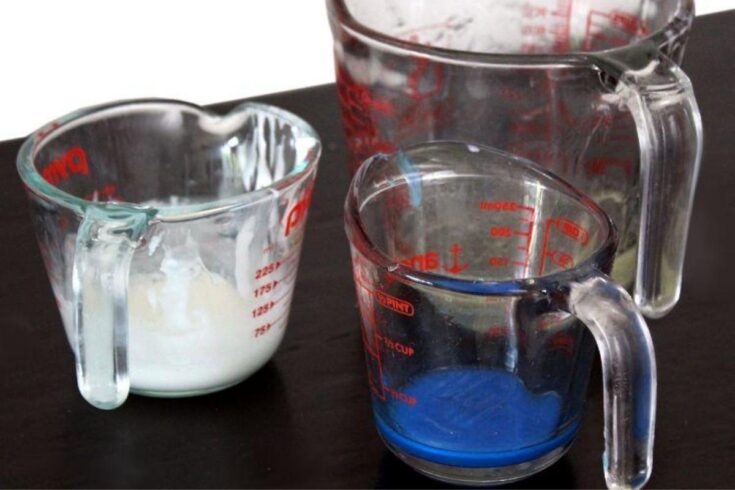
Add a drizzle of both the blue and the white soap base into the melted clear soap base in each of the cavities. Use a utensil to gently swirl the white and blue bases as desired.

Spritz with rubbing alcohol to remove any air bubbles. Then allow the soaps to cool completely.
Once the seashell soaps have fully solidified, gently remove the soaps from the mold. You can clean up the tops or edges of your soap bars with a small knife or a potato peeler.

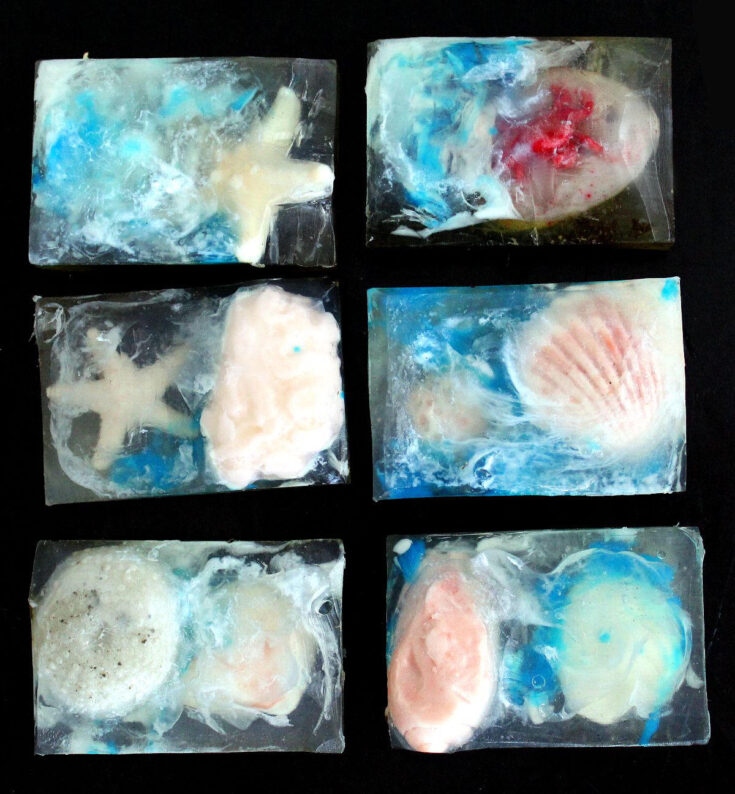
All that’s left is to tightly wrap your seashell soaps in foodservice film. They’re now ready for use or gifting!
Seashell Soap DIY

Learn how to make a DIY seashell soap using seashell soap embeds. This fun and easy melt and pour soap recipe is easy enough for beginners to craft at home this summer.
Materials
- 21 oz. clear melt and pour soap base
- 3 mL litsea cubeba essential oil
- 1 mL peppermint essential oil
- 12 drops amyris essential oil
- 1-2 oz. white melt and pour soap base
- skin safe blue mica powder
- 1 teaspoon calendula flower powder
- 1/2 teaspoon poppy seeds
- 1/2 teaspoon cornsilk powder
Tools
- seashell, beach rocks or sea glass soap embeds
- rectangle silicone soap mold
- digital scale
- graduated transfer pipettes
- glass measuring cups or bowls
- spray bottle with 99% isopropyl (rubbing) alcohol
- utensils (for mixing) and a large Chef’s knife
- cutting board
- measuring spoons
- microwave
- your imagination
Instructions
- Weigh out the clear melt and pour soap base. Cut the base into chunks and combine in a large Pyrex glass measuring cup. Heat the cubed soap the microwave in 30-second increments until melted.
- Use the graduated transfer pipettes to measure out and add the essential oils. Then stir the soap to mix in the fragrance.
- Pour a few ounces of the clear melted soap base into a separate measuring cup. Stir in a pinch of the blue mica and set aside.
- Position your soap mold at an angle on a stable surface on a cutting board.
- Measure out the exfoliants into a small bowl. Mix to combine.
- Add a small amount of the mixture to each of the cavities of your soap mold.
- Pour the clear melt and pour soap base onto the exfoliants and into the soap mold until it is about 1/3 of the way filled.
- Use a utensil to reposition the exfoliants along the bottom of the mold as desired. Spritz the top of they poured soap with alcohol to remove any air bubbles. Allow the soap to cool and harden before proceeding to the next step.
- Once the first layer of soap has hardened, place the mold flat onto your work surface.
- Weigh out the white melt and pour soap base. Cut into chunks then heat in a microwave safe container in 20-30 second increments until melted. Set aside.
- Spritz the tops of the soap in the mold with rubbing alcohol. Place your seashell soap embeds onto the hardened soap, arranging as desired.
- Pour the clear soap base into each of the mold cavities leaving a small amount of space at the top.
- Add a drizzle of both the blue and the white soap base into the melted clear soap base in each of the cavities, reheating if necessary. Use a utensil to gently swirl the white and blue bases as desired.
- Spritz with rubbing alcohol to remove any air bubbles. Then allow the soaps to cool completely.
- Once the seashell soaps have fully solidified, gently remove the soaps from the mold. Clean up the tops or edges of your soap bars with a small knife or a potato peeler.
- Wrap your seashell soaps in food service for storage or gifting.
Alternative Ways to Make DIY Seashell Soap
Of course, you don’t have to make your DIY seashell soap the same way I did. The great thing about artisan soap making is that is unique to the creator. So don’t be afraid that you’ll mess up or get it wrong. There really is not right or wrong way to craft your own artisan soaps for summer.

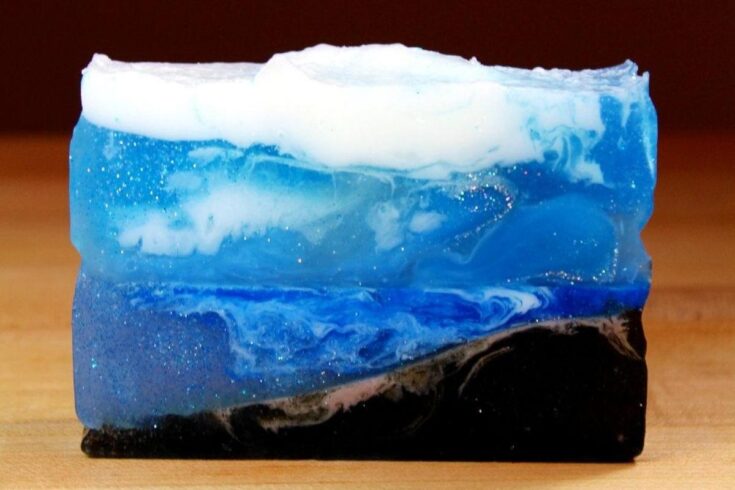
If you have a loaf mold, you can go into more detail creating water designs. Pictured above is a slice from the ocean portion of my mermaid soaps I made two years ago for my other blog, Soap Deli News. You can find the soap tutorial for my DIY melt and pour mermaid soaps here.
This DIY seashell soap tutorial originally appeared on my summer skin care recipes post at Soap Deli News blog.
Love my DIY seashell soap tutorial? Make sure you pin this post to Pinterest for later. You can also follow Becca Ink on Facebook and Instagram for more great DIY ideas.